How to create a Facebook Business Page – 2020
Why Your Business Needs a Facebook Page
It’s 2020 and almost everyone has a social media account of some sort. Facebook is the most widely used social media platform around the world. This is the number one reason it’s imperative to have a Facebook page for your business! It helps assist people in finding you as you can create your user name or your @ handle to be consistent across all social media platforms. I will walk you through how to create your Facebook page and edit your user name in this blog post. I also want to add that if you are not utilizing Instagram and Twitter, you need to get one! Be sure to keep your handle consistent across all of your social media platforms. This will help your customers and audience to find you easily.
How to Create a FB Page on Your IPhone
I have attached some screen shots that will make this really simple. If you’re doing this on your desktop or lap top computer keep scrolling down…it’s the next section.
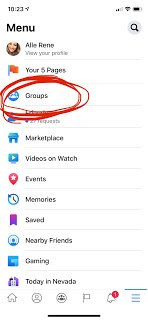
First click the little three lines at the bottom of your screen in your Facebook app.


NOTE: You may have to scroll to the left or right a bit to find the “Create” button.
Be sure to read the notes a litter further down on setting up your Facebook Page!
How to Create a FB Page on Your Desktop Computer
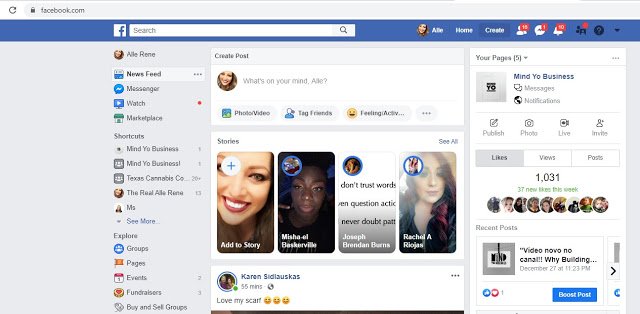
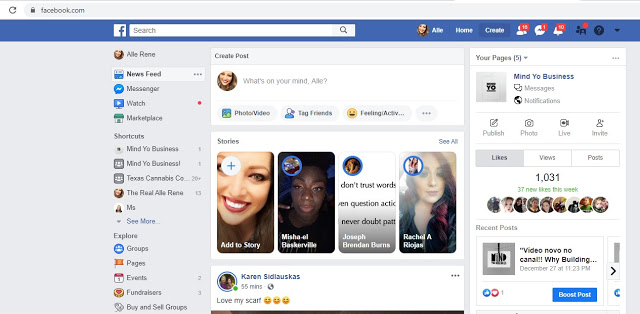
First click “Create” at the top right of your screen after you have logged into your FB account.
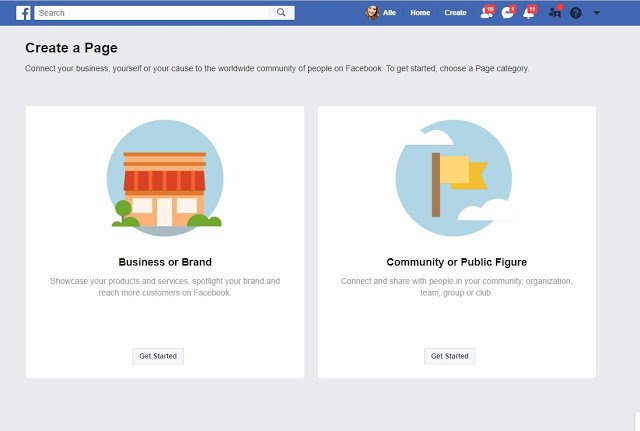
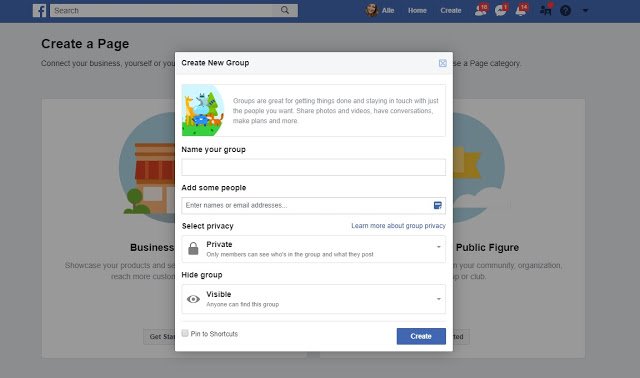
Then it will give you two options. Select the one for “Community of Public Figure” if you are a network marketer (this is because you do not actually own the company and you cannot represent yourself as such…so you will be branding yourself or your movement). If you own your business out right you would select the “Business or Brand” option which is equipped with and online store option and many other cool features to fit your needs.
Important Notes
After you have created your page be sure to fill in as much information about it as possible. It’s okay if you don’t have everything right away. You can go back and add it later as needed. Fill in the “General Info” and the “Page Info”. This tells your audience what your brand is about and what services you offer as well as your working hours so that they know when to find you. If you have a set posting schedule, share that here as well so they know when to catch you online.
Username
Depending on whether or not your on your phone or your desktop you will be able to edit your username in different areas. I find it easier on the desk top when you click “About” it’s right there on the page in front of your face! You can’t miss it. This is where you would put your username that you want to use across all of your other social media platforms. For instance I used @therealallerene because that is also my IG and Twitter handle.
I recommend keeping it simple and not putting hyphens or dashes or dots anywhere in the name. This makes it really simple for your audience to type it in anywhere. Notice mine above. Your desired name may be taken so before you chose it on one platform…make sure it’s available everywhere else.
One Last Tip!
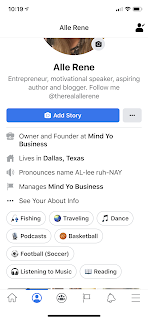
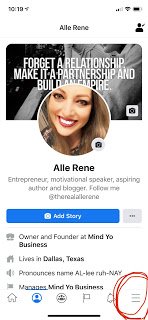
In this photo I have included a pic of my bio. This is what people see when they first visit your profile and yet another way to drive traffic to your page and your business. You can see I kept my bio really simple and put the things that I’m about and then my @therealallerene . Also notice I have put that I’m the CEO and Founder of Mind Yo Business. When you do this it hyperlinks to your profile so a new friend will go, “Hmmmm what is that?” and click the link. It takes them directly to the page where they can peruse around and check out the business. If they like it, they may follow the page! Win win for everyone and you did no leg work for that.
You can also attach your Facebook page to an exclusive FB group for your customers and audience to join. We will dive into the Facebook Group set up in a later post.
That is All!
You have everything you need to start your FB Page! Get to work and be sure to download the Facebook Page Manager app as well. It’s easier to see stats on your page and boost posts when you’re ready to do that! Hope you found some value in this content! Until next time!
For more tips and tricks and a list of our services, visit our website Mind Yo Business, Inc.